Sunday, December 30, 2012

Mint Chocolate Chip Cookies (Grinch Cookies)

When I asked my son what kind of cookies he wanted to make for Santa this year, he immediately said Grinch cookies.  (I had pinned this recipe from The Hungry Dudes a while ago and told him about them.)  I thought these were appropriate because his favorite Christmas movie is How the Grinch Stole Christmas...and because I LOVE chocolate and mint together.  I mean, I REALLY love chocolate and mint...Junior Mints, York Peppermint Patties, Andes Mints, Mint Chocolate chip ice cream...Mmm, Mmm! If you love any of those, then you are going to LOVE these cookies too!!  They are super easy and taste delicious!!  You could make them for Christmas, or just make them because they are fantastic!! We will definitely be making these BEFORE next Christmas!
~~~
Mint Chocolate Chip Cookies (Grinch Cookies)
1 pouch sugar cookie mix
1/2 cup butter or margarine, softened
1/4 to 1/2 teaspoon mint extract
6 to 8 drops green food color
1 egg
1 package Andes Mints
1 cup semisweet chocolate chips
Heat oven to 350.  In a large bowl, stir cookie mix, butter, extract, food color, and egg until soft dough forms.
 Sorry, had to include a picture of my son making his best Grinch face!
 He was my little helper that day!
 Stir in chopped Andes Mints (they recommended using a huge knife and I would recommend this too...took no time at all to chop!) and chocolate chips.

 Using a small cookie scoop or teaspoon, drop dough 2 inches apart on ungreased cookie sheet.  Bake 8 to 10 minutes.  Cool for about 3 minutes before moving cookies to a wire rack.  Store tightly covered at room temperature...before they disappear! :)
 Our elf, Haddy couldn't even stay away from these yummy cookies!!  Enjoy!  :)

Thursday, December 20, 2012

Oklahoma Breakfast Pizza

If you have family in town for Christmas and need to make a great breakfast that is different from your standard breakfast casserole, give this a try!!  This came from my Dad and it did not disappoint.  He actually cut it out of the Oklahoma newspaper of all places. It is so good and the best part is you can eat it with your hands!  :)
~~~
Oklahoma Breakfast Pizza
1 package Shawnee Mills pizza crust mix (I used a Pillsbury roll out crust)
8 Pork Sausage Patties (I used Jimmy Dean HOT sausage instead)
1 cup diced bell pepper
1 cup frozen hash brown potatoes, thawed
4 eggs
1/4 cup milk
1/2 cup shredded cheddar cheese (I just used all mozzarella)
1/2 cup shredded mozzarella cheese
4 slices bacon, cooked and crumbled
Preheat oven to 400.  Press pizza dough into pizza pan and set aside.  Brown sausage and bell pepper, drain, and set aside.  In a medium bowl, whisk eggs with milk.
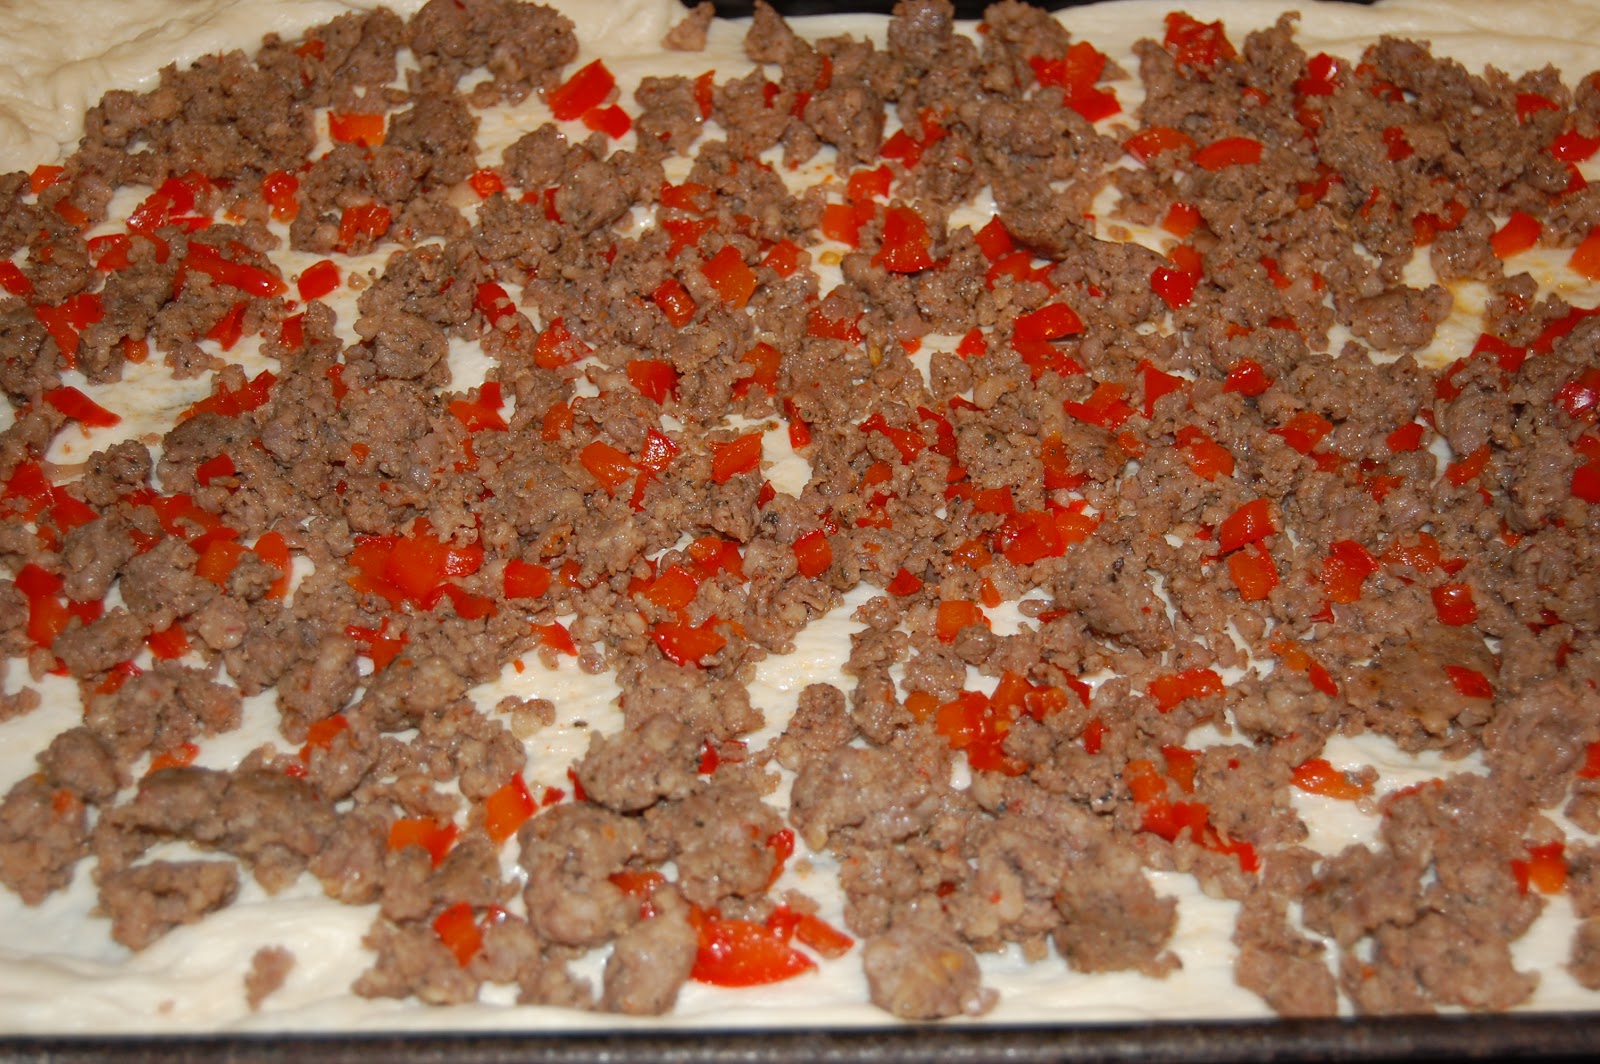
Spread sausage and bell peppers over pizza crust. 
 Top with thawed potatoes.
 Sprinkle with cheese and then carefully pour egg mixture over the sausage and cheese.
 Bake at 400 for 20-35  minutes.  Sprinkle with cooked and crumbled bacon.
(I will say that the edges of my crust got pretty brown, so half way through baking, I put foil around the edges of my pan to stop the edges from getting too dark.)

Yummy...this is SO GOOD!!!!  Enjoy!  :)

Thursday, December 13, 2012

Peppermint Bark

If you need an EASY, DELICIOUS treat to take to a holiday party this year (or just a yummy treat to have at home!), then this recipe is for you!  With only 2 ingredients, you can't go wrong!!  
~~~
Peppermint Bark
2 bags (12 oz each) white chocolate chips
1 cup peppermint candies (I used 11 candy canes)

Place candy canes in a resealable plastic bag and crush with a meat mallet or heavy saucepan.  The meat mallet worked GREAT!
 Line a 15X10X1 inch baking pan with foil.  Coat with nonstick cooking spray.  Place chips in a large glass bowl.  Microwave for 1 minute.  Stir.  Repeat, stirring until smooth.  It only took 2 total minutes to melt mine.  Fold half the crushed candies into the melted chocolate.
 Pour onto prepared pan, spreading almost to edge of pan.
 Sprinkle top with remaining crushed candy canes.  Refrigerate until firm, about an hour.
 Break into pieces to serve...that is IT!!
This is seriously yummy stuff...and I will warn you, a little bit addicting!  Enjoy!  :)

Thursday, December 6, 2012

Double Crunch Honey Garlic Chicken Breasts

This is another recipe that I had pinned from Rock Recipes.  Oh my...it was GOOD!!  This was my first time to ever fry anything.  We don't normally eat like that, but I will definitely bend the rules for this!  I know it looks like a lot of ingredients, but it really isn't bad.  You have most of this stuff in your pantry!
~~~
Double Crunch Honey Garlic Chicken Breasts
4 large boneless chicken breasts (place the chicken between two pieces of plastic wrap and using a meat mallet, pound to 1/2 inch thickness
Sift together:
2 cups flour
4 teaspoons salt
4 teaspoons pepper
2 tablespoons ground nutmeg
2 teaspoons ground thyme
2 teaspoons ground sage
2 tablespoons paprika
1 teaspoon cayenne pepper
(The recipe says this mix makes enough for two batches and you can freeze half of it. I halved it and still had a ton!)
Egg wash:
whisk together 4 eggs and 8 tablespoons water
Honey Garlic Sauce:
In a medium saucepan add:
2 tablespoons olive oil
3-4 cloves minced garlic
Cook over medium heat to soften garlic, but don't let it brown, then add:
1 cup honey
1/4 cup soy sauce
1 teaspoon pepper
Simmer for 5-10 minutes, remove from heat and allow to cool.
Season the chicken with salt and pepper and then dip in the flour/spice mixture to coat.  Then, dip in the egg wash and then dip in the flour/spice mixture again.  Press to coat.  Heat a skillet just below medium with a half inch canola oil covering the bottom.  Fry gently about 4-5 minutes per side until golden brown.
 Dry chicken on a wire rack for a couple of minutes before coating in the garlic honey sauce.  Serve over rice or noodles.

Seriously yummy stuff here!!  Enjoy!  :)

Thursday, November 29, 2012

Chicken Pesto Linguine

My friend Melissa recently emailed me with this recipe and she had me at the word pesto!  I don't know about you, but I LOVE anything with pesto in it...yum, yum!!  This recipe did not disappoint.  The pictures don't do it justice at all.  It was easy and delish!
~~~
Chicken Pesto Linguine
2 chicken breasts
1 teaspoon olive oil
1 tablespoon Italian seasoning
salt and pepper, to taste
1/2 cup water
12 oz. linguine
1 cup chicken stock
1/2 cup Parmesan cheese 
1 teaspoon basil
1 teaspoon parsley
1 teaspoon lemon juice
2 tablespoons butter
1/4 to 1/2 cup pesto, to taste  (I went for the full 1/2 cup!)
1/4 to 1/2 cup toasted pine nuts or walnuts
Preheat oven to 350.  Toss chicken, oil, and Italian seasoning.  (This is the only part of the recipe that I would change.  I thought there was way too much Italian seasoning.  I would do much less the second time around. there are so many other flavors in the end that you don't need this.)  Add 1/2 cup water to pan and bake for 30 minutes, or until cooked through.  Cook linguine according to package directions and set aside.  Remove chicken from oven and cool.  Pull into small strips.
 Bring chicken stock, Parmesan cheese, basil and parsley to a simmer.
 In a large serving bowl, toss lemon juice, butter, pesto, pine nuts, cooked chicken, and chicken stock mixture until coated.
 Allow flavors to combine for 5-10 minutes and serve warm.
Mmm...this was so good!  Enjoy!  :)

Tuesday, November 13, 2012

Dijon Chicken Linguine with Mushrooms and Toasted Almonds

I have one word to say about this recipe...AMAZING!!!  It really is simply amazing.  You MUST make this soon...it is fantastic!  There are a few steps, but it isn't hard at all.  It moves pretty quick, so just set all of your ingredients out with all of your measuring spoons and you will be ready to go.  This recipe definitely tastes restaurant quality!  I got it from Rock Recipes and will definitely be back to try more of their recipes.  YUMMY!!
~~~
Dijon Chicken Linguine with Mushrooms and Toasted Almonds
350 gram package fresh linguine, cooked
4 boneless skinless chicken breasts (I just used 3)
1 cup mushrooms (I used more than a cup because I heart mushrooms!)
3 tablespoons olive oil
4 cloves minced garlic
Salt and pepper to season
1/2 cup toasted slivered almonds


Heat olive oil in a large heavy bottomed frying pan over medium low heat. Add chicken breasts, garlic, season with salt and pepper and continue to fry the chicken until completely cooked.  (I had to scoop out the garlic after a few  minutes because it was becoming too brown.  Next time I will add the garlic at the very end when the chicken is almost done.)

Remove chicken from pan and hold in a warm oven.


 Add 4 oz white wine to the pan and simmer until volume is reduced by  half.
Then add 2 cups whipping cream, 3 tbsp Dijon mustard and salt and pepper to season.  Simmer until sauce thickens enough to coat a metal spoon.  (This didn't take long.)
 Return Chicken to the sauce, add the mushrooms and simmer for an additional 2 minutes. 
 Serve over cooked linguine. Sprinkle with toasted slivered almonds.
I'll say it again, this is seriously AMAZING! Enjoy!  :)

Tuesday, November 6, 2012

Chicken Pasta Salad

I don't know about you, but I STRUGGLE with what to eat for lunch every day.  BIG.TIME!  I'm not a sandwich person, unless it is from someplace yummy, so I normally end up eating something random for lunch.  Last week I remembered a recipe that my friend Jessica used to bring to school when someone on our team had a birthday.  It is so yummy and crazy easy.  I decided to make it for dinner one night and then munch on it for lunch for several days.  Best idea ever!  I will definitely be doing this more often!
~~~
Chicken Pasta Salad
1 package rotini noodles cooked and drained (I use the garden kind with the different colors...makes it pretty...because you know, that is important!)
2-3 cups rotisserie chicken, shredded
1 can chopped tomatoes, drained
1 can chopped tomatoes with basil, oregano, and garlic, drained
1 (3 oz) can chopped ripe olives (I'm not an olive fan, so I leave these guys out!)
1 bunch green onions, chopped (I did about 6)
1/2 cup shredded Parmesan cheese (I did a full cup)
Italian dressing to taste
Ready for EASY...mix all ingredients together!  Seriously, it doesn't get any easier than that!!  I usually let it sit overnight before serving...it seems to just get better. 
I do have to mention that this makes a TON, so it is great for a lunch with the girls or even a shower.  It lasted us DAYS!  Enjoy!  :)