Tuesday, October 25, 2011

Crispy Southwest Chicken Wraps

I confessed in my last post that I *might* have a slight addiction to Pinterest. Well, I'm SO GLAD I do, because I found this next recipe on there and it is nothing short of AMAZING! The first words out of my husband's mouth were that it tasted like something he could order at a restaurant. SCORE! I definitely agree and it is definitely a dish that will be on our weekly menu many more times. The recipe originally came from MelsKitchenCafe and I will definitely be making some more things from her blog!

~~~

Crispy Southwest Chicken Wraps

1 cup cooked rice, warm or at room temperature

1 cup cooked, shredded chicken

1 can black beans, rinsed and drained

1 green onion, finely sliced (white and green parts)

1/2 red or green pepper, diced (I used red)

1/4 cup fresh cilantro, chopped

juice on one lime

1/2 tablespoon chili powder

1 teaspoon ground cumin

1/2 teaspoon garlic salt

2 cups shredded cheese (I used Montery Jack/Colby)

Sour cream (optional) - I did this and it was great!

6 Burrito-sized flour tortillas

Mix rice together with chili powder, cumin and garlic salt. Add remaining ingredients except for cheese and sour cream.


Sprinkle cheese over tortillas, leaving 1/2 inch border around edges. (Optional: dot the cheese with sour cream)

Arrange chicken and rice mixture down the center of each tortilla.

Roll stuffed tortillas, leaving edges open. Spray the tortillas all over with cooking spray. Heat a large non-stick skillet (or griddle) over medium heat for 1 minute. Arrange 2 wraps, seam-side down in pan and cook until golden brown and crisp, about 2-3 minutes per side.


I cannot express to you how delicious these are! You really need to make them QUICKLY! Enjoy! :)

Monday, October 24, 2011

Pumpkin Muffins

OK, so I'm going to go ahead and throw it out there that I might have a small addiction to Pinterest these days. If you are on there, you have probably seen this next recipe...although I'm not even sure you can call it a recipe when it consists of 2 ingredients! I needed a baked good item to take to my son's school for their Pumpkin Carnival and I immediately thought of the pumpkin muffins that I had pinned. Easy is a complete understatement!! They took all of 2 seconds (OK, maybe a little longer) to prepare and they were YUMMY! Yes, they didn't all make it to his school. :)

~~~

Pumpkin Muffins

1 box yellow cake mix

1 (15 oz) can of pumpkin

Drop both items in a bowl.
Mix it up. Yep, it's that easy! I will say that the batter is really thick, so be prepared for that. Bake at 350 for 20 - 25 minutes.

I sprinkled the top with powdered sugar.

Another idea from Pinterest...I put ribbon around a paper plate to dress it up a little since the items were going to be going home with people. These were so moist...VERY GOOD! Enjoy! :)

Monday, October 10, 2011

Southwestern Black Bean Salad

This past weekend, we had a football party to attend and were supposed to bring a side item. Well, I have been pinning recipes on pinterest, but had yet to make one yet, so I figured it was time! This came from Skinnytaste and oh my goodness...SO GLAD I found this website! I definitely will be making more of her recipes! This was so easy, yummy, and best of all, actually good for you! Win, win!

~~~

Southwestern Black Bean Salad

1, 15.5 oz can black beans, rinsed and drained

9 oz frozen corn, thawed

1 tomato, chopped

1 small hass avacado, diced

1/4 cup red onion, chopped

1 scallion, chopped (I forgot this...oops!)

1 lime, juice of

3 tbsp extra virgin olive oil

1 tbsp cilantro

Salt and fresh pepper

Combine beans, corn, tomato, onion, scallion, cilantro, salt and pepper.

(I doubled this recipe if it looks like a lot to you.)

Aren't the colors pretty?? LOVE it!

Mix with lime juice and olive oil. Marinate in the refrigerator for 30 minutes.
Add avacado before serving. (Sorry...this picture isn't flipped on my computer, but for some reason it won't quit turning on blogger...grr!)

There were a lot of people eating this, and everyone liked it! I served it with tortilla chips. I did add a little garlic salt because I felt like it needed a little something extra. SO good and fresh! Enjoy! :)

Thursday, October 6, 2011

The BEST Cherry Pie EVER!!!

OK, for as long as I can remember, I have requested a pie for my birthday. Yep, no cake for me...a pie. Two certain pies to be exact...cherry or chocolate banana. So, this year was no exception. When my mom asked me which pie I wanted, I promptly said cherry. But then, I had a request. I asked that she make it at my house so I could learn how she does it. Not that I plan on making my own birthday pie every year, but my mom's cherry pie is hands down the BEST cherry pie you have ever tasted. I know that one day she won't be able to make them, and I'm going to need to know her secrets. So, now I know and I'm passing them on to you! If you are a fan of cherry pies, take some time and make THIS one. It really isn't even difficult...I was pleasantly surprised!


~~~


The BEST Cherry Pie


2 pie crusts (Now, my Mom normally makes her own crust. I'm not going to lie, she has tried to teach me how to do this, and I am unable to do it...I have given up. Pillsbury it is for me!)


Filling:


2 cans (16 oz each) pitted tart red cherries


1 cup sugar


1/4 cup cornstarch


1/4 tsp salt


2 tsp Cream Sherry (This is her secret ingredient. She has a tiny bottle of it...you have to buy it at a liquor store. She said the bottle has lasted for years since she only uses it for this recipe. The alcohol cooks out of it, so don't worry about that. Her original recipe calls for almond extract (1/4 tsp) if you want to use that instead.)


1 tbsp butter


sugar for sprinkling on top


Preheat oven to 425. Drain the cherries and reserve 1 cup of the liquid from the cans. Combine the sugar, cornstarch and salt and stir to blend. Add the reserved cherry juice and stir until smooth.
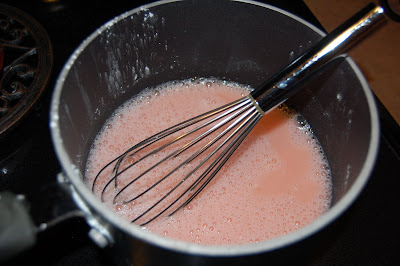

Place pan over low heat and stir constantly until thick and bubbly. It will look like this:
Boil gently for one minute and then remove from heat. Stir in the drained cherries, butter and Cream Sherry. Mix well. Pour into pie crust. Cut the second pie crust into long strips and make a cross on the pie.
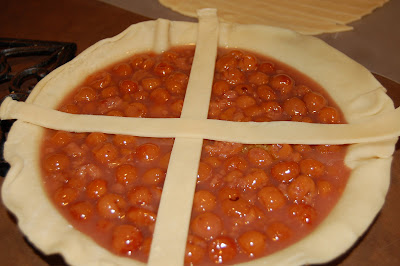
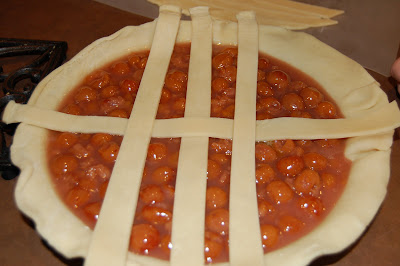
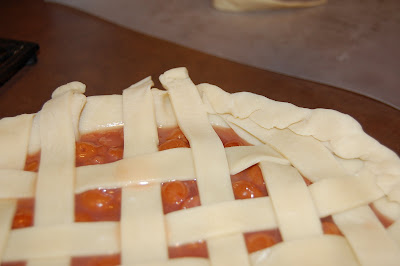
Continue putting the strips over the top to get the lattice look. It is just an over, under pattern.
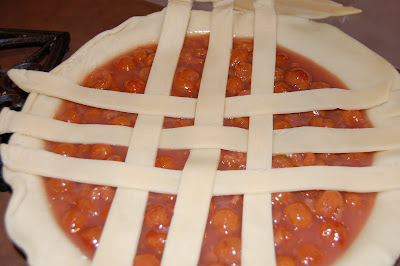


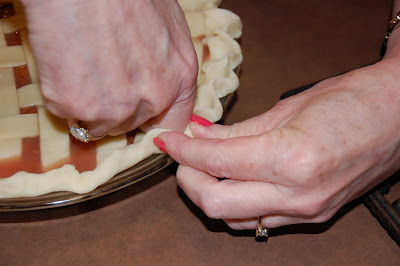
Fold the crust over to seal.

Here is Mom doing the crust...I still need practice on this too!

Sprinkle sugar over the top of the pie. (Please excuse the excess sugar...my son wanted to help!)


Tip: When baking a fruit filled pie, line your baking sheet with foil in case it boils over.
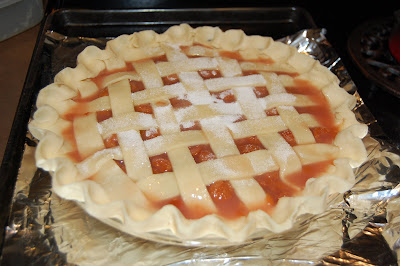

Bake for 25 minutes. Lower the heat to 375 and bake for 20 -25 minutes longer or until the crust is golden brown.


Isn't it pretty?!?


It tastes even better than it looks...I promise! Enjoy! :)